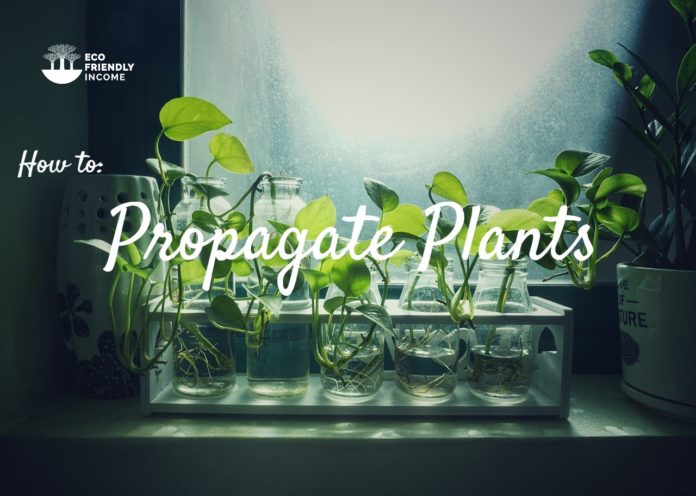
To propagate plants, what a pleasure!
Among all the methods there are to propagate plants, cuttings are the most common because of their numerous advantages.
Results may vary and aren’t always guaranteed but by following the steps in this guide, you will rarely be disappointed.
Take this advice to heart and the art of plant cuttings will hold very few secrets to you.
Plant Propagation: A Win-Win
Maybe you just want to propagate your favorite plants or you want to share what you got with your friends? Perhaps you want to propagate some delightful plants you spotted on vacation? (Careful not to bring back invasive species).
Taking cuttings can do all of that, without much effort and with almost zero expense!
It’s actually a natural thing, plant cuttings can naturally grow roots in humid, tropical, swampy environments without human interaction.
Table of Contents
- What are Plant cuttings?
- Advantages of Cuttings
- Plant Cutting Seasons
- Equipment
- The Best Soil
- How to take Plant Cuttings
- Elements for Success
- Pro Techniques
- Signs its Working
- Repotting & Acclimatization
What are Plant Cuttings?
A plant cutting is a rootless piece of plant that’s separated from a mother plant and put into a certain environment to cause natural root growth.
A plant cutting is incapable of feeding itself without roots, so naturally, a mechanism within itself activates and initiates root growth.
When we take cuttings from plants indoors or in our garden, the next step will be to replicate the natural environment that allows it to initiate root growth.
For that, the most important elements are:
- Humidity
- Light
- Soil type
- Warmth
We’ll get into details about this later in the guide.
Advantages of Plant Cuttings
- Low Cost: You can take hundreds and thousands of cuttings for free!
- No Doubts: With seeds, you never know if its going to sprout or not, but with cutting you’ll see if they failed.
- Can Save Plants: You can take cuttings from a plant that’s got a root sickness or some kind of damage and save it!
- Increases Your Knowledge: Many plants have different propagation techniques, you’ll learn countless new gardening techniques.
Of course, success is not guaranteed, but with every attempt at taking cuttings, your success rate will only go up. Year after year, your skills will improve and you might even come up with your own tricks!
Advice for Beginners
If you’ve never taken plant cuttings before, we recommend that you start on plants that almost never miss.
For example, pelargonium and sedum are almost guaranteed to root every time.
Stay away from large trees (They lose their ability to root from cuttings), and plants with bulbous roots (they’ll rarely reform that large root). Also, it’s not desirable to take cuttings if you wish to make bonsai trees.
When you start with simple to root cuttings, you can get a better look at the different stages. Like if it’s making roots, if roots are already there or if it’s dying or failing.
Tag Your Cuttings
From the very beginning, use tags for your cuttings.
If you don’t, you’ll eventually lose track of what is what. It saves a lot of time, looks more professional, and feels great to have everything organized.
Make sure to write down the entire name of each plant, down to the variety, and to write down the date it was taken.
It’s also handy to use a little notepad to keep track of your whole cuttings collection. With it, you can periodically make reports on their progress.
Keep track of where you took the cuttings, the type of soil you put them in, the time of year they were taken, and how long they take to root.
This information is a great asset to propagate plants. Years of notes like this will really take your game to the next level.
Plant Cutting Seasons
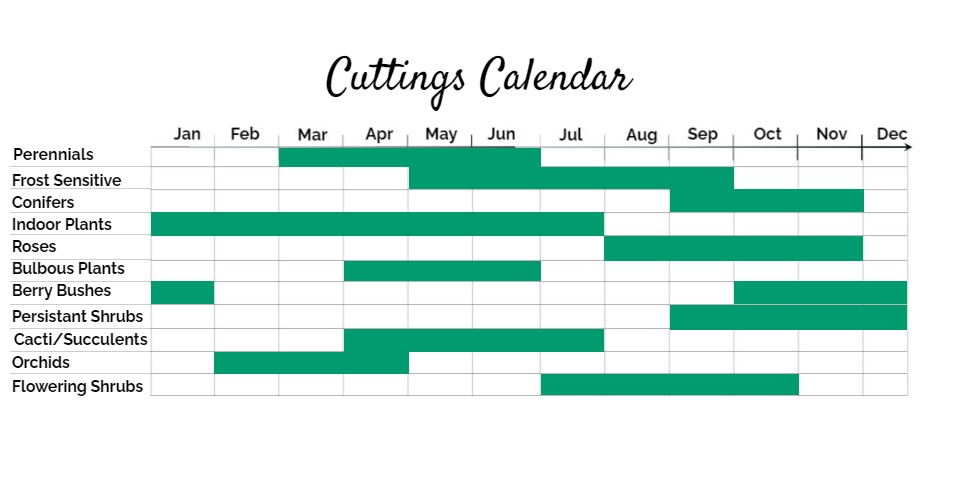
Here is a Calendar for Each Cutting According to its Category:
What You Need to Get Started
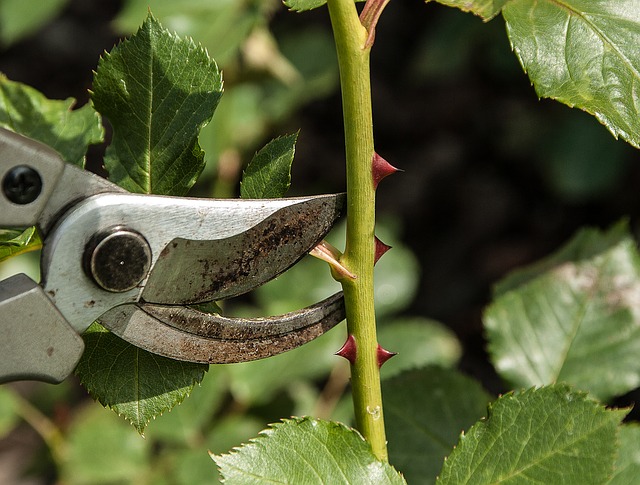
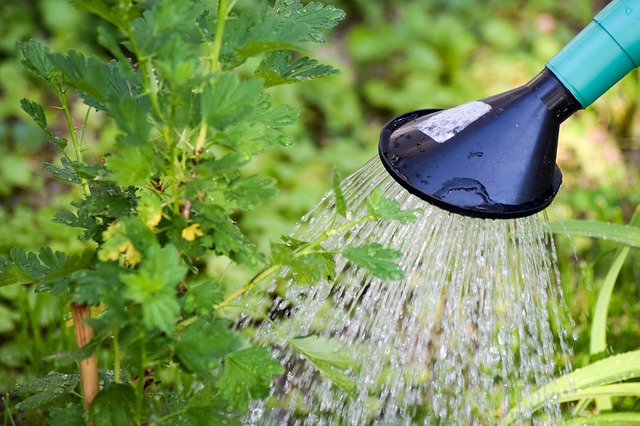
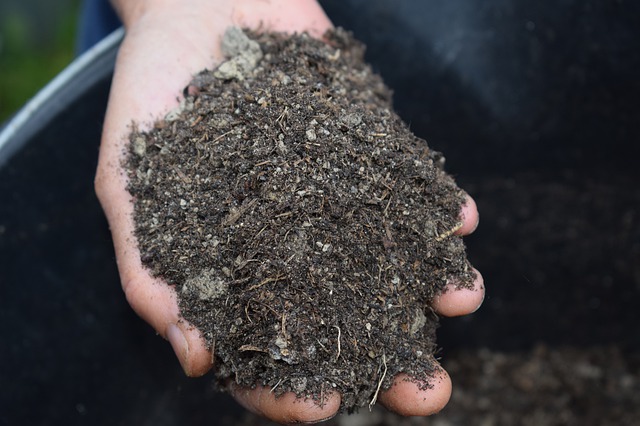
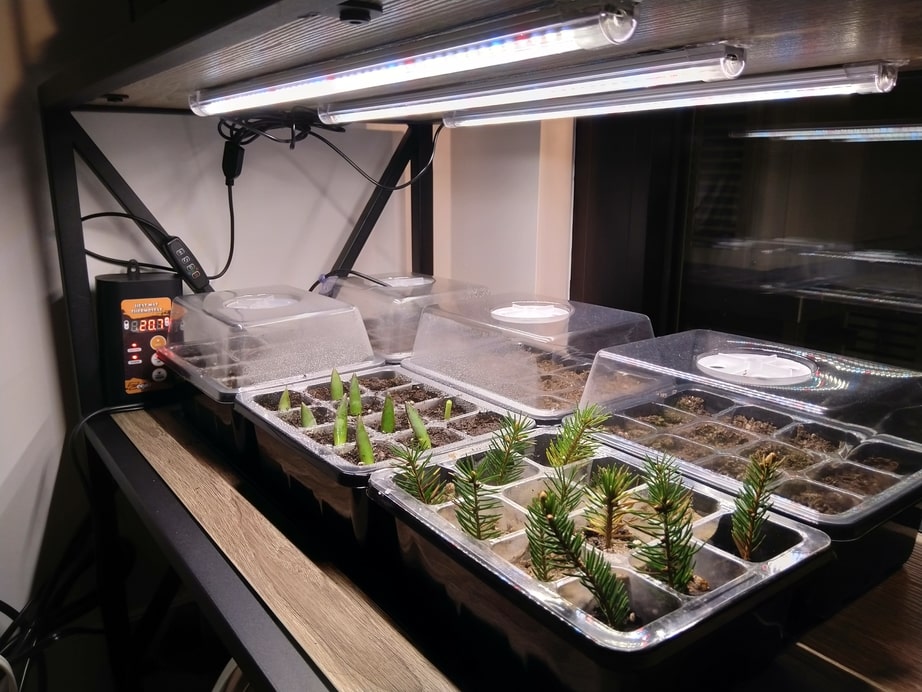
To start taking cuttings, you’ll need basic gardener’s equipment:
- Sharp Shears
- Pots, or Propagators
- Sand, Perlite, Fine Bark Mulch, Peat Moss
- Heating Mat & Full Spectrum Lights (Optional)
- A Hose or Watering Can
Tip: Always disinfect your pruning shears before use, they can spread diseases from plant to plant.
The Best Equipment for Plant Propagation
To be successful with cuttings, you need the proper pots. The best kind of pots for cuttings have a good ability to hold water and allow the soil to breathe. Easier said than done.
Plastic pots are the best for holding water, but also don’t allow for air to breathe, unless they have built-in vents.
These small plastic propagators are really the kings of plant propagation. Plant cuttings in truth, evaporate more water than they can absorb.
Its closed-off environment really helps hold in humidity and the vent at the top allows aerating without messing around with the lid.
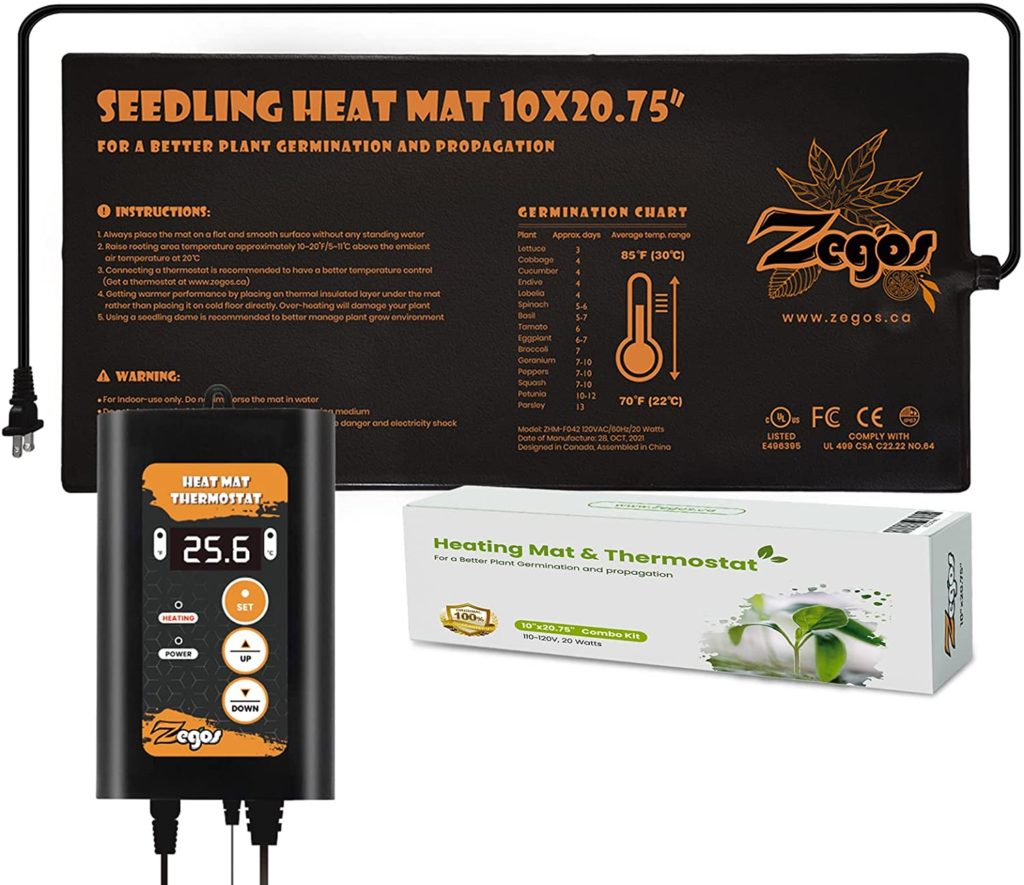
A heating mat, along with a thermostat can help keep your cuttings at the perfect temperature. Full-spectrum LED lights also provide a great light source at a low cost.
Indoor plant propagation stations are a great way to continue experimenting with cuttings during winter.
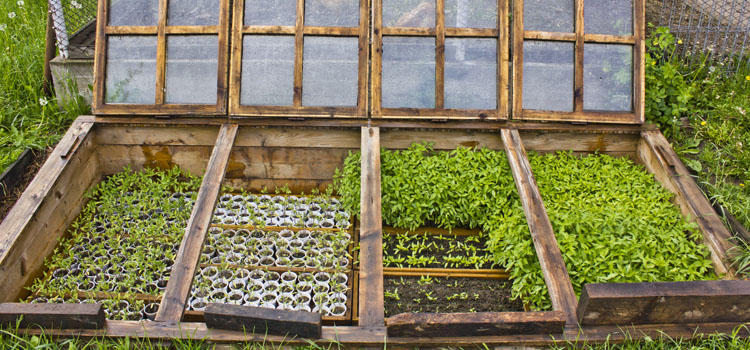
Propagation Frame
Propagation frames are built outside, are non-heated but well adapted to propagate plants. It’s built lower than the ground level which helps protect your cuttings against frost damage later in the season.
It’s easy to access your cuttings with a frame since you can just easily lift the lid. To prevent roots from going into the soil below, a frame should have at least a foot of propagation substrate.
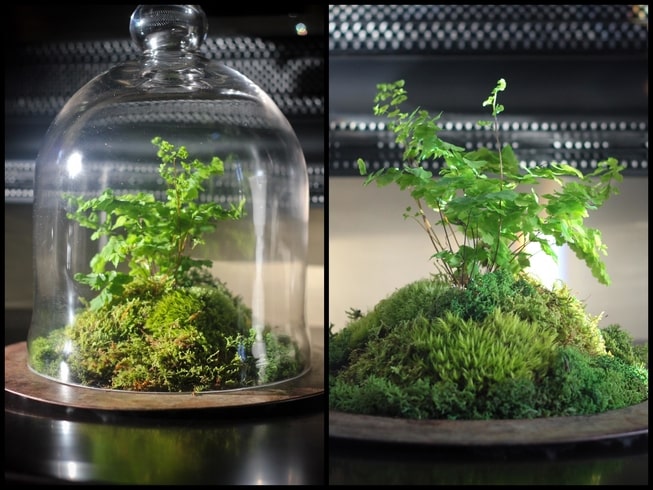
Glass Cloche Greenhouse
A glass cloche is a great alternative for your plant cuttings indoors, outdoors, or in your greenhouse. It does a great job keeping a humid environment and its rounded shape provides a natural source of heat when pointed in the sun.
Although they can be quite costly and fragile.
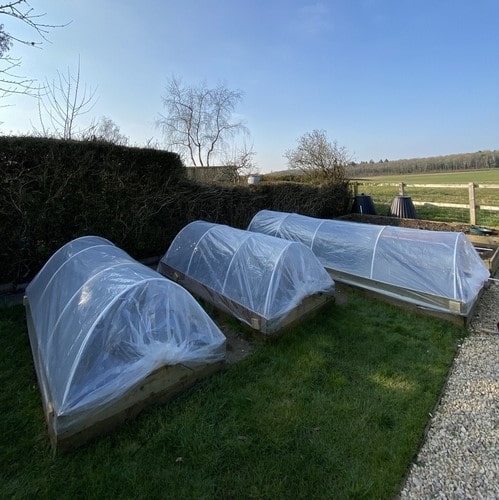
Tunnel Greenhouse
Some tubing and plastic wrap are all you need to make tunnel greenhouses. It does a great job keeping in humidity, but not the greatest in holding in heat. Best used for conifer cuttings or only during the warm season.
It’s not so eco friendly to use that large plastic wrap, chances are you’ll have to change them every couple years.
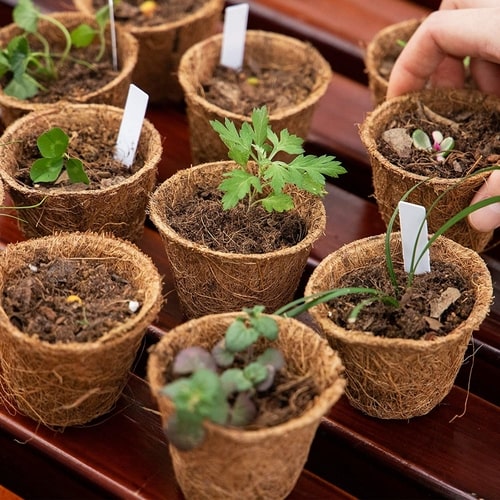
Coconut Husk Plant Pots
Coconut husk holds water quite well and allows for breathing too, it’s a great eco-friendly alternative.
The Best Soil to Propagate Plants
Good soil for cuttings must hold a certain level of humidity without asphyxiating the cutting. It should also feed the plantlet when its first roots appear.
You can make acceptable soil from a wide variety of ingredients, there’s quite a debate on what to use within the propagation world. Some substrates work better for certain plants while a handmade mix might work for a large variety of plants.
In reality, the most important aspect is good porosity.
You can achieve a good cutting soil mix by following the rule of three:
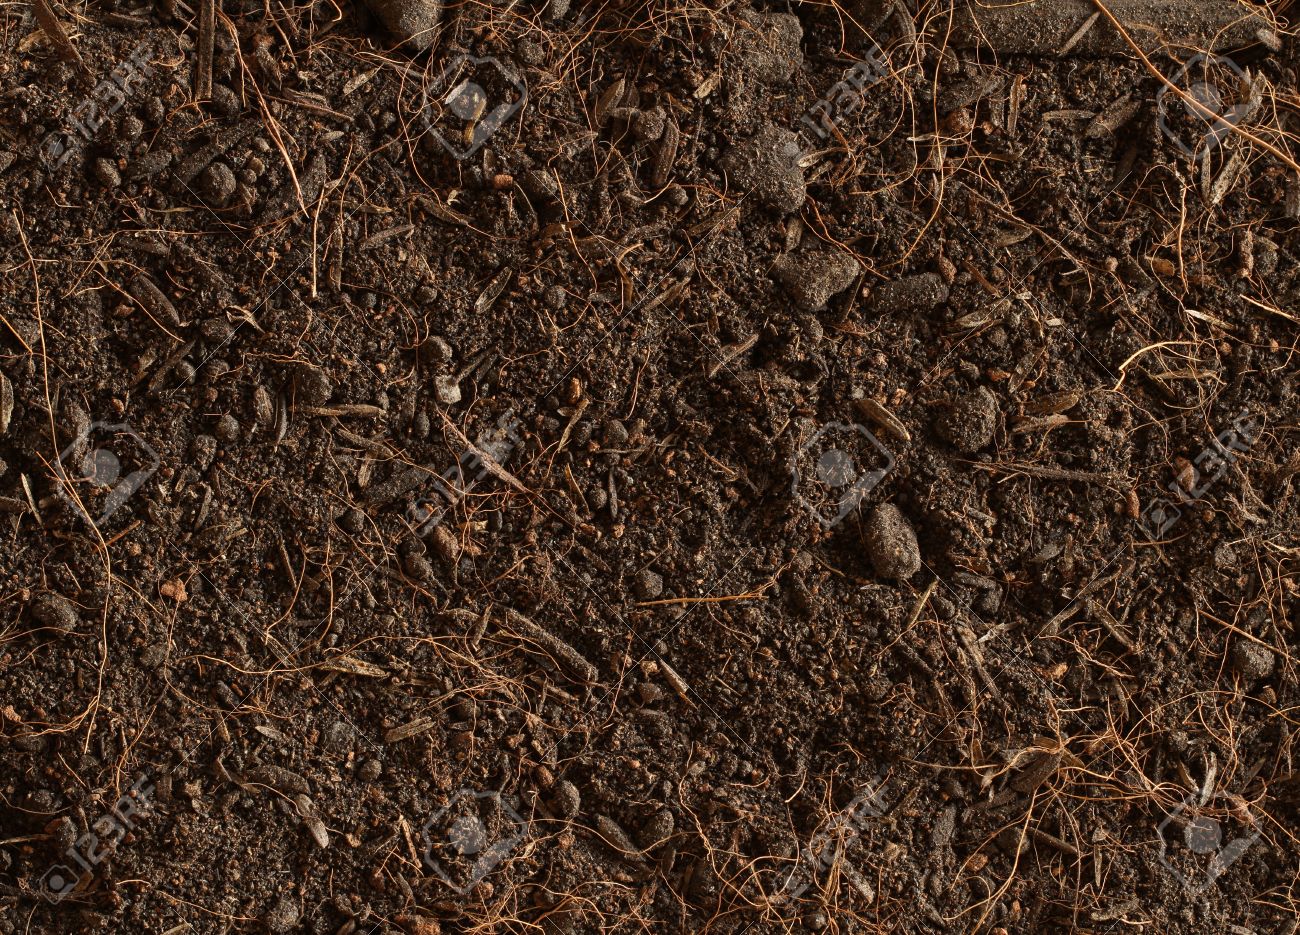
- One Parts Potting Soil: Helps maintain humidity, and feeds the cutting once rooted.
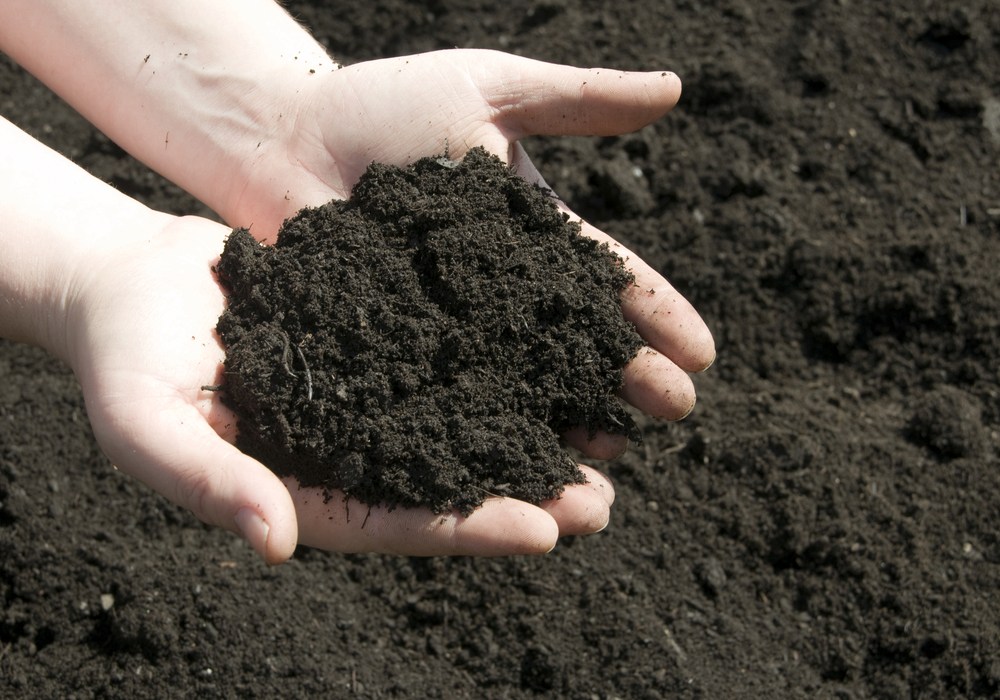
- One Parts Garden Soil: Its fine particles adhere to the cutting and facilitate water absorbtion.
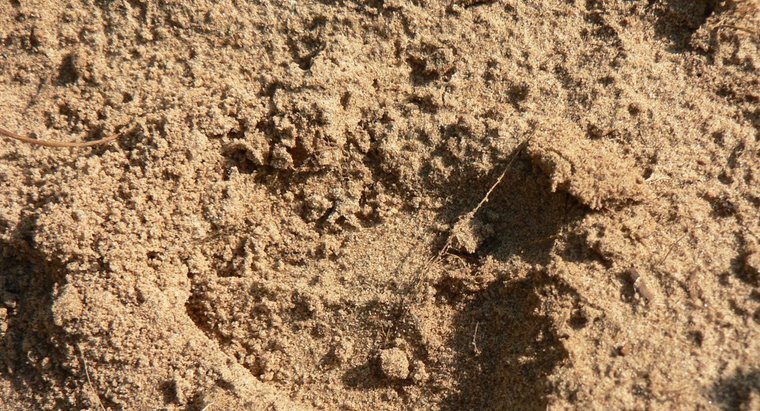
- One Parts Inert Material: Helps the mix have proper aeration, and drainage.
With a 1:1:1 mix of potting soil, garden soil, and sand, you get a pretty ideal soil mix for cuttings.
Tip: There are some types of plants we know of that require a changeup in this mix’s proportions.
Fleshy leaved plants like succulents, aloe, sedum, and jade plants prefer a 50/50 sand/potting soil mix.
Swampy or humid climate plants prefer a mix with a great capacity to hold water like peat, coconut fiber, or vermiculite. Higher potting soil ratio.
Dry climate plants appreciate a mix with higher porosity like a mix of gravel and sand.
Indoor plants love a mix high in organic matter like peat or coconut fiber. Higher potting soil ratio.
Avoid cheap potting soil at all cost, their texture is too sticky for cuttings and usually holds plenty of organic matter that’s not even decomposed yet. It might even have weeds in it, it’s just not worth your money.
While potting soil and garden soil are not so interchangeable, you have a large variety of choices for inert materials.
Let’s look at a few and see what’s good about them:
Inert Materials
You don’t always have to go with sand, if you don’t have access to it, you can use other things for your inert material.
- Hydroton: Very porous, holds moisture, but doesn’t mix so well with substrate.
- Coconut Fiber: Great to aerate substrate, holds moisture but must be washed first as it holds lots of salt.
- Gravel: Completely inert, doesn’t hold moisture and not so easy to mix.
- Rockwool: Doesn’t rot, but not so great for mixing.
- Perlite: Porous, mixes well, holds moisture. A top choice.
- Lava Rock: Porous, but can create space for germs to colonize.
- Vermiculite: Doesn’t rot, holds moisture very well, but not always easy to find.
- Sand: Mixes very well, holds humidity. A top choice.
How to Propagate Plants by Taking Cuttings
To propagate plants, there are 4 simple steps that you need to take:
- First, determine the best type of cutting according to each plant. Find your plants in our propagation section.
- Second, take the cutting from the proper portion of the plant.
- Third, prepare the cutting for the soil.
- Last, plant the cutting in the soil, and maintain it.
Types of Plant Cuttings
Determining the type of cutting according to each plant is the most important step to propagation. Take the wrong type of cutting and you’ll be waiting a long time for nothing.
How can you know what portion of the plant to take a cutting from?
It depends on the plant, each portion has its own properties and advantages in a propagation scenario.
Softwood Cuttings
That’s usually the plant’s new growth, which is usually bright green, soft, and sensitive to moisture and heat.
They root the fastest, but can also die the fastest.
Cuttings from recent growth work best on plants with fleshy leaves that don’t form wood. For example, pelargoniums or succulents.
Semi-Hardwood Cuttings
That’s the year’s new growth that’s gone partly hard, it’s not as sensitive and holds moisture better.
It’s the middle ground for plant cuttings, they can still root fast and have better survivability.
Cutting on semi-hardwood works best on perennials, shrubs, and trees.
Hardwood Cuttings
That’s when you take cuttings on old growth, that’s hardened and holds nutrients and moisture very well.
They will generally root much slower but have a much higher capacity to survive.
Usually, taken with a heel, hardwood cuttings have offshoots that readily root in a propagation scenario.
Works best for persisting shrubs and conifers.
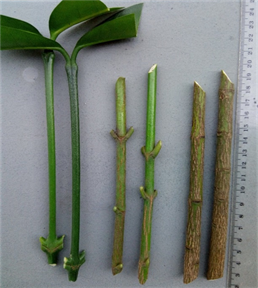
Softwood, Semi-Hardwood & Hardwood Cuttings.
Tip: Wounding the bark on the bottom 1-2cm of each hardwood cutting will help them root faster. A greater area of exposed bark allows for a higher portion of the plant to make contact with substrate and root.
How to Prepare Your Plant Cuttings
There are a few rules in regards to your plant cuttings:
- When you can, always take the cuttings just below a node.
- Remove all leaves on the portion that will be below the soil.
- Remove all of the flowering bulbs.
- Leave only a few leaves at the top, cut the large leaves in half.
- Remove the extremities of the cuttings, especially fresh new growth.
- For some plants, wounding the cutting at the base encourages root growth.
Mistakes to avoid
- Cuttings that are too long: Most cuttings should be taken in the 6-8 inches range (15-20cm).
- Cuttings that are too soft: For the majority of plants, they’ll be too young to form leaves.
- Too many leaves: Cuttings with too many leaves will lose too much water to evaporation.
- Cuttings are too thick: For most plants, cutting diameter shouldn’t exceed the size of your pinky finger. Anything bigger will likely fail.
- Taken from a sick or old tree: Sick plants are much harder to propagate and older trees have a much smaller capacity for propagation.
How to Plant Your Cuttings
Now with a sharp knife, cut your plant below the node at an angle. Be careful not to rip the plant tissues, or it will make it harder to propagate.
Your soil mix is likely to have some elements that might hurt the plant if you push too hard into it. Poke holes first, not too deep, before putting your cuttings in soil.
Dip in rooting hormone, shake off the excess, place the cutting in the pre-made holes, and tamp the soil around it.
Leaves shouldn’t be too close to the soil but also not too far away. Hose down generously to let the soil settle around the cuttings.
You can also hose down before planting if you’re worried about the rooting hormone getting washed off.
The Elements for Success
Now that your cutting is prepared, it’s ready to root. From now on, temperature, humidity, and light will greatly affect your success. If you keep each at the perfect level, your chances of success will greatly increase.
Temperature
The ability for cuttings to root depends on the temperature of their environment. Temperature regulates the cellular activity of plants, hence their metabolism.
Cuttings can feel too cold but rarely do they feel too warm! Even then, try to avoid extremes on the scale.
Generally, indoor plants require different temperatures than outdoor plants.
For example, plants acclimated to the outdoors can resist colder temperatures and can deal with winter frost.
While house plants will propagate well under temperatures in the 25-30 degree range.
Monitor Carefully.
If the temperature is too hot, aerate the propagator, and mist the cuttings with water. Let the water run down the plants and evaporate, temperatures should have reduced and the propagator can be closed again.
For outdoor propagation frames, white paint can be used to help reflect light and keep temperatures low.
If the temperatures are too cold, close the propagator or move your cuttings away from frost. Heating mats or small heaters can help increase their temperature to avoid freezing.
Tip: Use a thermometer that imprints the day’s lowest and highest temperature. This way you can track if the cuttings are too cold at night or too warm during the day.
Humidity
Watering and humidity are two separate factors that fit in one category. When we water, we hydrate the substrate but when we talk about humidity, we mean the atmosphere within the propagator.
When it comes to watering, you want your substrate to stay permanently humid but not wet and soggy. The substrate shouldn’t be dripping wet if you pick it up in your hands.
Use a watering can with a fine outlet to avoid major splashing. If the substrate is too dry, it’s always best to water from underneath.
The atmosphere within your propagators should be saturated with water. Water droplets consensed on the glass or plastic are a great indicator that your atmosphere is properly saturated.
When you don’t see that, it’s a good time to water the substrate.
Warning: Some plants like succulents require a dry atmosphere.
If you can harvest rainwater, do so! That’s the best source of water for your cuttings. This fresh, clean water free of sediments prevents white crusts from forming on plant tissues that work against propagation.
Light
A great source of light is important to root cuttings but direct sunlight must always be avoided.
Light from dawn is alright because of its low intensity but mid-day sun will cook your cuttings in a matter of minutes.
Lack of light will cause cuttings to deform or simply die.
A good place to put them indoors is by a window and outdoors is on a north-facing wall of a barn, shed, or home.
Alternatively, you can buy LED grow lights and set them up above the propagators.
Proper lighting is primordial for plants to create their energy.
Pest Control
Plant cuttings shouldn’t have many enemies since they’re sheltered from the outside environment, but it’s possible that their worse enemy is enclosed in the propagators with them.
Insects, parasites, or fungi can attack your cuttings, even if they’re from different plant species. They’re in an enclosed environment so it doesn’t give them many other choices.
A good way to prevent this is the regularly inspect your cuttings for any signs of pest damage.
It’s important to react at the first sign of infestation. We discourage the use of chemical pesticides because they can stay on the cuttings for long and cause problems later.
Instead, we recommend using eco friendly pest control methods.
Types of Pests and Signs of Infestation
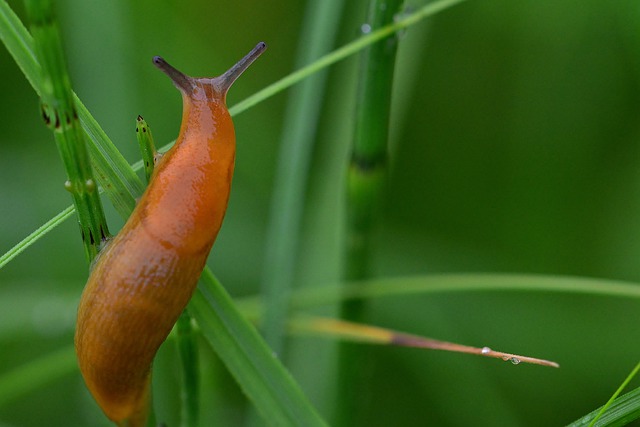
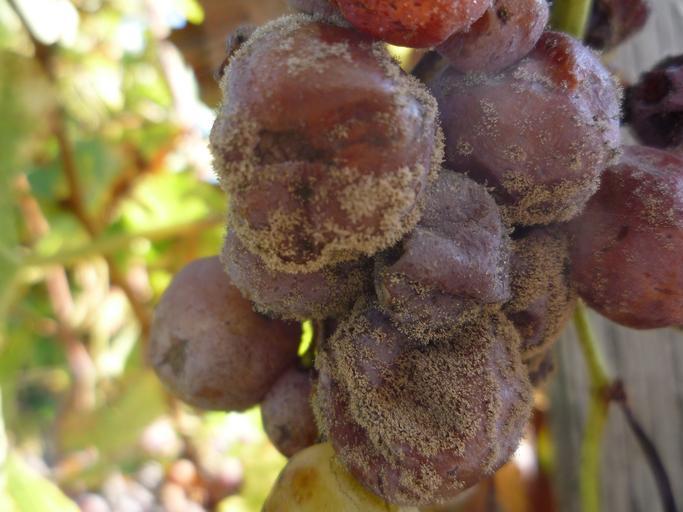
- Slugs & Snails: Eats soft-leaved cuttings, infiltrates by soil.
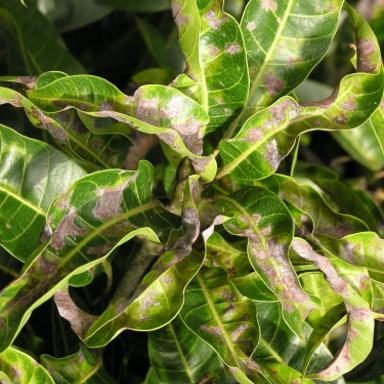
- Oidium: Leaves become covered in white velvet. Not enough aeration.
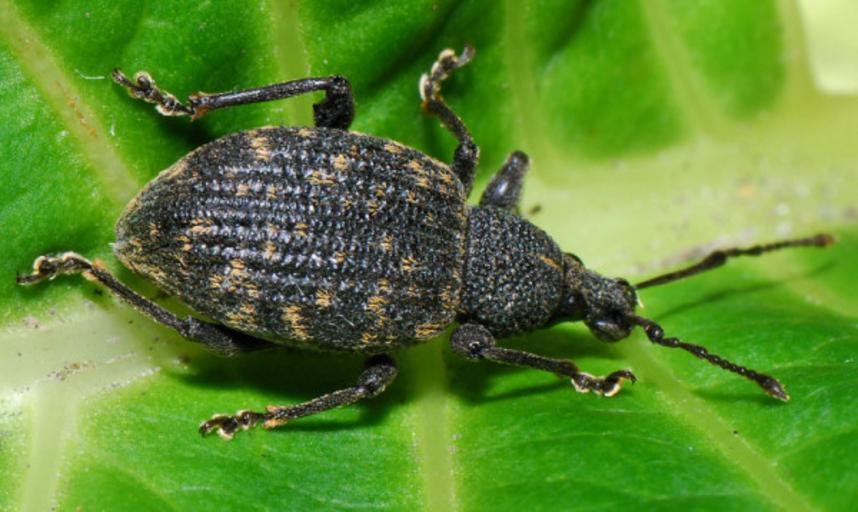
- Otiorhynchus: Eats leaf edges on persistant plants. Usually only attacks cuttings in outdoor settings.
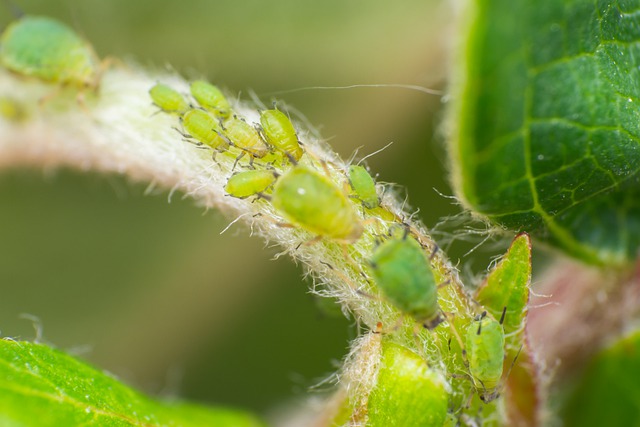
- Aphids: They love cuttings because they thrive on young plant tissues. An atmosphere that’s too dry helps them proliferate.
- Botrytis: Makes cuttings rot and die. Happens when they cuttings are too densely packed.
Rooting Hormone
You can still root cuttings without rooting hormones but when used right, it can increase your chances.
How it works: Cuttings produce a substance at the base of the cuttings right before rooting, this hormone mimics that substance. Hence, using rooting hormone accelerates the process and preserves the precious energy inside each cutting.
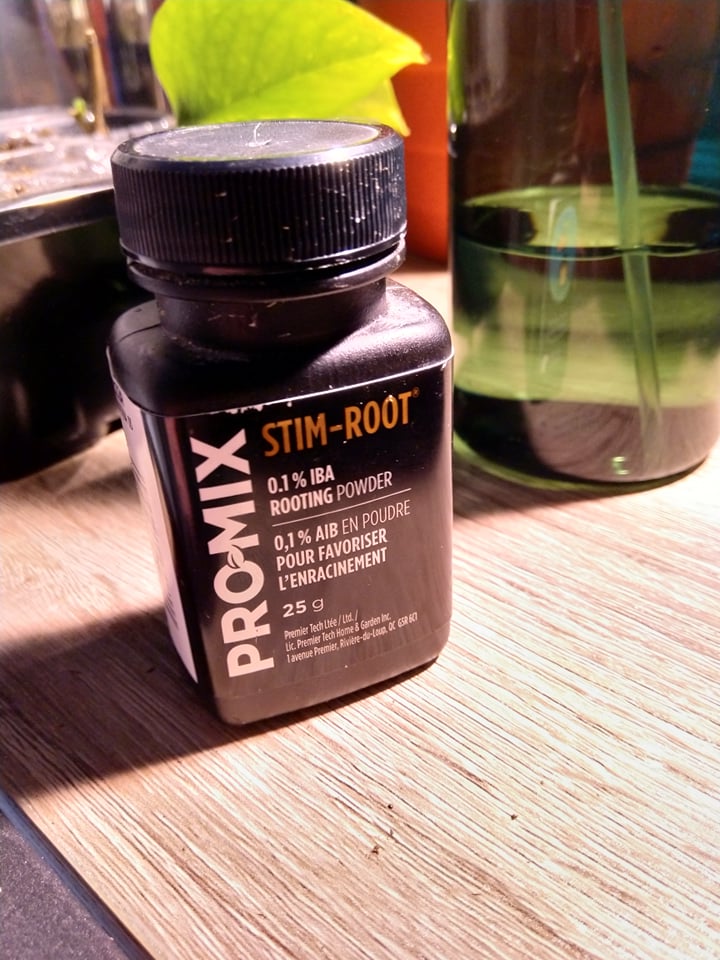
Usually, it comes in a small container like this in powder form but you can also get it in liquid form.
How to use it: Just dip the end of your cutting in the powder, and knock off the excess powder with a flick.
It’s important to shake off the excess because too much can actually hurt the cutting, blocking it from rooting.
Tip: When rooting cuttings in water, avoid powder and go for the liquid hormone instead.
How to Propagate like a Pro
Horticulturists take the propagation game to the next level by using automated systems.
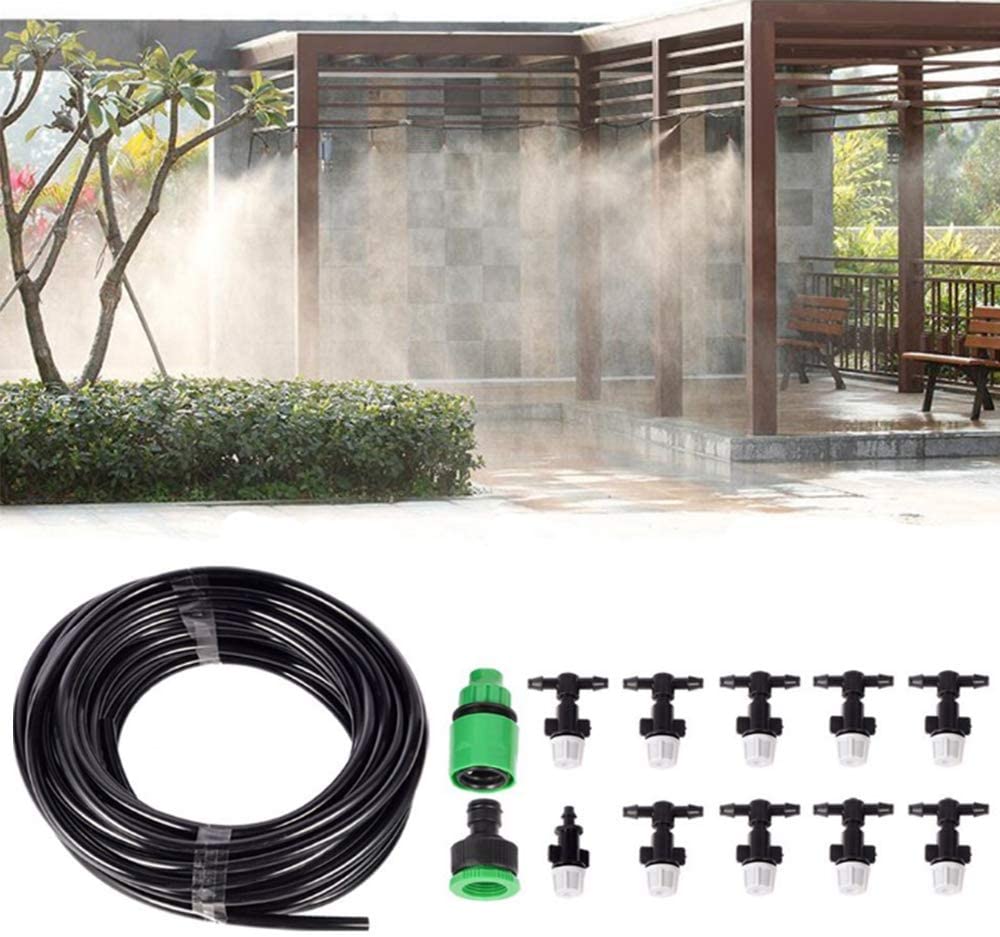
Instead of watering by hand, automated mist systems provide the perfect level of moisture all day. For example, you can set up your system to spray every 20 mins.
When you have this sort of setup inside a greenhouse, you can propagate in a pure perlite substrate.
Some systems, such as aeroponics, spray the cuttings from under and allow you to root them in the air.
Pro tip: Keep your most successful cuttings as mother plants and use them as future sources of cuttings. Young, vigorous plants are the best sources of cuttings.
Automated mist systems like this are really worth looking into if you want to propagate plants on a large scale.
Plant Propagation Tech
Professionals have even gone as far as inventing new products to increase their success.
Let’s see what’s available today:
- Rooting Gel: A kind of syrup that solidifies with contact with air. All you need to do is the poke your cuttings in the gel. Its composition offers perfect rooting envionment with added nutritive substances.
- Silica Powder: Perfect for rooting in soil, strengthens plant tissues and helps prevent bacteria from causing problems
- Vitamin Complex: They stimulate plant tissue growth under the soil. Useful to add in water before spraying the soil and leaves.
- Anti-transpiration Spray: It covers the cutting and its leaves with a fine layer of latex that prevents moisture evaporation. It’s best used when preparing the cuttings, then it breaks down within 2 weeks.
- Mushroom Spores: They can create symbiotic relationships with the cuttings and stimulate root growth.
While these might work for a professional, it’s not guaranteed to work for everyone. A good idea is to test it out and to write down your results in your handbook.
Signs that Your Cuttings are Rooting
How can you know if it’s working? You can’t just go around tugging at your cuttings, you might actually rip off the fragile roots.
With a sharp eye, you can see the first signs of rooting. It might take weeks though, it’s quite normal for your cuttings to stay the same for weeks, or months before actually starting to root.
You can always look under your pots to see any sign of roots poking through.
Alternatively, you can tilt the pot upside down to very carefully extract the soil pod. If you’re good, you can take it out without the soil breaking apart. Like this, you can see if roots have made their way to the outskirts of the soil pod.
Don’t panic if the leaves fall off your cutting. It doesn’t mean it’s dead, it might just be that the cutting is shedding its leaves to retain moisture.
Signs that They’re Failing
- The cutting turns into a slight olive color a few days after it’s planted.
- It dries out without the leaves falling off
- Leaves continue to grow immediately after the cutting is put into the soil.
- It quickly wilts and softens within hours.
Tip: Do not add fertilizer to your cuttings. Cuttings live off their reserves, and the rooted cutting finds its nutrition within the soil mix.
When the roots find their way to the bottom of the pots, you’ve succeeded and it’s finally time to re-pot them!
Re-Poting Your Cuttings
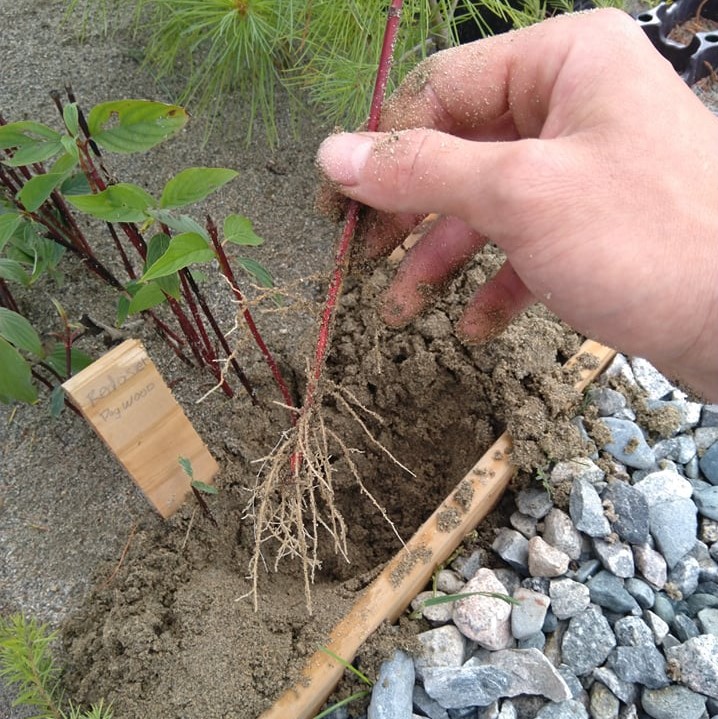
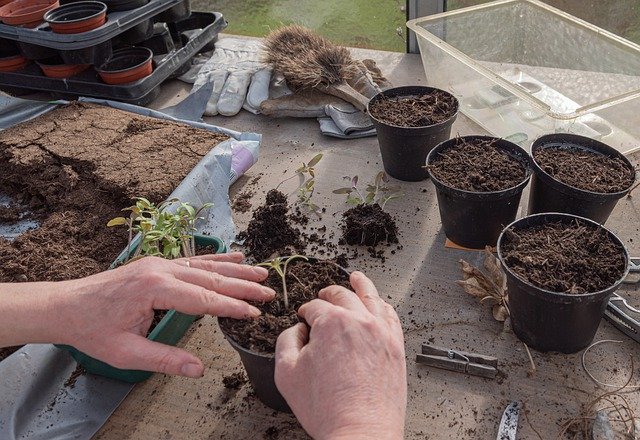
When your cuttings have finally rooted, you need to change their soil and re-pot them into something larger. The new soil needs to have more nutrients for the plantlets to grow.
First, water the original substrate well to facilitate extraction. By that we mean turn it into a slur, this way the roots will be hydrated and the cuttings will come out easier.
Next, break apart the soil and separate each cutting carefully.
If you were rooting in water, wait for the roots to at least be 5cm long before transplanting.
Don’t rush to re-pot your cuttings too soon, you could actually kill it that way. Don’t wait too long either, the plantlets will starve in the nutrient-poor substrate.
The importance of re-poting depends on the original substrate you used. A nutrient-poor substrate will need to be changed, but a substrate that’s already fairly rich in nutrients won’t need to be re-potted quickly.
The most important part is to be careful with the roots.
Acclimatization
Once your cuttings are rooted, they’ll continue growing but they’ll still be sensitive to environmental change.
If you take cuttings from inside into the outdoors environment too soon, they’ll have a rough time making it through the cold season. Better to keep them inside for the first winter.
If you’re propagating your plants outside already, it’s okay to leave them out in the winter, as long as they are well-covered by snow.
The Last Step: Planting them in the Ground
Finally, when your cuttings have grown tall enough to compete with surrounding foliage, it’s time to plant them in the ground.
First, remove weeds from the dedicated spot, and plow the soil.
If the plant’s roots are large enough that they touch the edge of the pot, it’s ready to plant.
Carefully remove the root ball, and place it into a hole about twice its size. Spread the roots in every direction, then cover with soil.
Tip: You can put a guiding stick with each cutting if their stems are too soft. This will prevent the wind from damaging them.
Conclusion
Here’s a recap of what we learned in this guide:
- What are Plant Cuttings?
- Their Advantages
- Best Months to Harvest Cuttings
- Equipment & Soil to Get Started
- Plant Cuttings Types, How to Prepare & Plant Them
- The Elements for Success
- How to Propagate like a Pro
- Signs Cuttings are Rooting
- Re-Potting
- Acclimatization
- Planting Them in the Ground
You should have all the information for top success rooting cuttings.
Now it all comes down to finding your favorite plants to root. For ideas, take a look at our plant propagation section!
If you’re from a cold region like me, you might also find our zone 2 trees & zone 2 perennials list useful.
If you love rooting cuttings, maybe you’re interested to start a plant nursery, a tree farm? You could also propagate native species and plant forest crops on your land. The sky is the limit!
